


Ejecutar un protocolo estandarizado de guía para cargar y surtir una máquina expendedora requiere preparar previamente los lotes de productos en su almacén utilizando telemetría DEX en tiempo real, aplicar una estricta rotación de productos "primero en entrar, primero en salir" (FIFO) en el sitio y ajustar las dimensiones de los artículos al paso de la espiral. Seguir un flujo de trabajo de 5 pasos repetible en el sitio reduce el tiempo de permanencia en la ruta hasta en un 40% mientras evita atascos de productos, columnas agotadas e inventario caducado.
Por qué la disciplina de surtido impacta directamente en los márgenes de la ruta
Un operador desorganizado pierde ganancias en la parte trasera de una furgoneta de reparto mucho antes de llegar a la ubicación. Al atender una ruta de 15 a 30 máquinas, la carga desorganizada del inventario infla el tiempo de permanencia, provoca atascos frecuentes de productos y genera costosas existencias caducadas. Un proceso de reabastecimiento estandarizado protege directamente la rentabilidad de la ruta al maximizar las ventas por parada y minimizar la mano de obra no facturable del conductor.
Cuando un operador ahorra 10 minutos en cada parada de servicio en una ruta de 20 máquinas, libera más de 3.3 horas de trabajo por día de servicio. Ese tiempo recuperado se traduce directamente en capacidad de expansión de la ruta sin añadir costos de nómina. Además, una técnica de carga inadecuada —como forzar bolsas de papas fritas anchas en espirales estrechas o atascar bebidas enlatadas en columnas mal alineadas— causa fallas mecánicas que dejan a las máquinas fuera de servicio, reduciendo los ingresos hasta que llega un técnico de mantenimiento.
Terminología esencial de máquinas expendedoras que todo operador debe conocer
Comprender la terminología estandarizada de la industria garantiza una ejecución clara entre los conductores de ruta, el personal del almacén y la documentación técnica:
-
Nivel de stock (Par level) es la cantidad máxima de unidades de producto que una columna o espiral específica de la máquina está diseñada para contener sin abarrotar ni atascar.
-
Pre-kitting (preparación de lotes) es el proceso de empaquetar previamente las cantidades exactas de productos en lotes específicos para cada ubicación en el almacén antes de realizar la ruta, basándose en los datos de ventas de telemetría remota.
-
Planograma es un diagrama visual que traza qué SKU de producto pertenece a cada posición de fila, estante y columna dentro de una máquina expendedora.
-
Primero en entrar, primero en salir (FIFO) es una práctica de rotación de inventario donde el stock más antiguo se mueve al frente de la espiral o estante para que se venda antes que el stock más nuevo con fechas de caducidad posteriores.
-
Sensor de caída es un sensor óptico infrarrojo ubicado en la parte inferior de la bandeja de entrega que verifica que un producto haya caído físicamente antes de completar la transacción o cobrar al cliente.
-
Frecuencia de reabastecimiento es la periodicidad programada (ej. semanal, quincenal) con la que un operador atiende y repone una ubicación basándose en el volumen de ventas diario.
-
Paso de la espiral (Coil pitch) es la distancia de espacio entre los bucles individuales de una espiral metálica, lo que determina cuántas unidades caben en una sola fila de columna.
-
Tiempo de permanencia (Dwell time) es el tiempo total que un operador pasa estacionado en el sitio para dar servicio, limpiar y reabastecer una máquina.
Planificación previa al viaje: Pre-kitting vs. método de almacén móvil
Preparar el inventario (pre-kitting) en el almacén utilizando datos de telemetría remota es significativamente más eficiente que mantener un almacén móvil dentro de un camión de ruta.
| Criterios operativos | Pre-kitting (basado en telemetría) | Almacén móvil (stock en camión) |
| Tiempo de permanencia promedio por parada | 7 – 10 minutos | 18 – 25 minutos |
| Eficiencia de combustible y carga del vehículo | Alta (transporta solo el inventario necesario) | Baja (transporta exceso de inventario pesado) |
| Tasa de merma y daño de producto | < 0.5% | 2.0% – 4.0% (productos aplastados/vencidos) |
| Precisión del seguimiento de inventario | 98%+ sincronización automatizada | Manual, propenso a errores de registro |
| Capacidad de ruta diaria por conductor | 20 – 25 máquinas | 10 – 12 máquinas |
El flujo de trabajo de almacén para el pre-kitting en 4 pasos
-
Extraer datos de telemetría: Exporte los registros de ventas DEX de 24 horas desde su software de Sistema de Gestión de Vending (VMS) para generar listas de picking de inventario en tiempo real para cada ID de máquina.
-
Preparar los lotes (totes): Alinee los contenedores de plástico apilables y codificados por colores en su área de preparación del almacén, etiquetados con el número de ubicación y de máquina específico.
-
Preparar el inventario al nivel exacto: Seleccione los productos directamente de los estantes del almacén hacia cada contenedor usando la lista de picking generada, ajustándose a los conteos de columna y niveles de stock exactos.
-
Cargar el vehículo de ruta en orden inverso: Cargue los contenedores preparados en su furgoneta de reparto en la secuencia inversa de sus paradas de ruta planificadas, colocando los contenedores de la primera parada directamente junto a las puertas traseras.

Para reducir su huella operativa inicial, evalúe cómo los sistemas de seguimiento y control de inventario automatizan todo este proceso.
Flujo de trabajo estandarizado para cargar y surtir una máquina expendedora
Ejecutar un flujo de trabajo estructurado en 5 pasos garantiza una precisión total del inventario, mantiene la higiene de la máquina y evita fallas mecánicas durante la ejecución de su rutina de guía para cargar/surtir una máquina expendedora.
+-----------------------------------------------------------------------------------+
|                     FLUJO DE TRABAJO DE REABASTECIMIENTO EN SITIO (5 PASOS)       |
+-----------------------------------------------------------------------------------+
| Paso 1: Telemetría y auditoría  --> Conectar dispositivo VMS o extraer log DEX    |
| Paso 2: Mecanismo de monedas     --> Recoger caja y rellenar tubos de monedas      |
| Paso 3: Carga de inventario FIFO--> Mover stock viejo adelante, cargar nuevo atrás|
| Paso 4: Revisión mecánica/sensor--> Verificar espiral y limpiar sensores ópticos  |
| Paso 5: Venta de prueba y limpieza--> Probar pagos y limpiar cristal/teclado      |
+-----------------------------------------------------------------------------------+
Paso 1: Asegurar el sitio y extraer auditoría DEX
Estaciónese de forma segura en la zona de servicio designada, lleve su lote pre-preparado al interior y desbloquee la máquina. Conecte su lector de telemetría celular o dispositivo portátil VMS para registrar el log de auditoría DEX inicial antes de tocar el inventario o los mecanismos de efectivo.
Paso 2: Servir el mecanismo de monedas y retirar la caja de efectivo
Retire la caja de efectivo de la carcasa del validador de billetes y guárdela en una bolsa de ruta bloqueada. Inspeccione los niveles de inventario del mecanismo de monedas:
-
Verifique el inventario de los tubos de monedas para cuartos, monedas de diez y cinco centavos.
-
Rellene los tubos de monedas bajos hasta su nivel estándar ($30 a $50 por máquina) para garantizar que la unidad nunca desactive las compras en efectivo debido al modo de "cambio exacto".
-
Limpie cualquier moneda doblada, residuos o billetes atascados en la boca del validador.
Paso 3: Ejecutar la rotación FIFO y reabastecer
Nunca coloque producto nuevo frente al stock existente. Siga estrictas prácticas de rotación "primero en entrar, primero en salir" (FIFO):

-
Introduzca la mano en la espiral o canal y tire de todos los artículos restantes hacia la puerta de entrega.
-
Verifique las fechas de caducidad de los artículos retirados; aparte cualquier artículo dañado o vencido para el registro de mermas.
-
Deslice el nuevo inventario en los bucles traseros abiertos de la espiral o en la parte posterior del canal, manteniendo las etiquetas mirando hacia adelante.
-
Verifique que los artículos descansen en un ligero ángulo hacia atrás (aprox. 5 a 10 grados) para que no se caigan prematuramente hacia adelante.
-
Implementar estrategias fiables de rotación de productos minimiza las pérdidas de inventario en toda su operación.
Paso 4: Ajustar motores, divisores y sensores de caída
Inspeccione las holguras físicas a lo largo de cada fila de bandeja:
-
Asegúrese de que los divisores de plástico laterales encajen perfectamente contra el empaque del producto sin pellizcar los bordes.
-
Verifique que las espirales estén en su "posición de inicio" real, donde la punta del alambre metálico apunta hacia abajo en la posición de las 6 en punto.
-
Limpie las lentes de los sensores ópticos de caída en la parte inferior de la bandeja usando un paño de microfibra seco para evitar falsas detecciones causadas por la acumulación de polvo.
Paso 5: Realizar ventas de prueba y desinfectar
Cierre y bloquee la puerta principal de la máquina. Realice dos transacciones de prueba: una en efectivo y otra con una tarjeta de crédito sin contacto. Verifique la salida del producto, confirme que el cambio sea correcto, limpie los puntos de contacto externos (cara de vidrio, teclado, ranura de inserción de billetes) con limpiador desinfectante y registre la finalización en su aplicación móvil.
Optimización del planograma y tamaño del paso de la espiral
Adaptar la geometría del empaque del producto directamente al paso de la espiral y a la altura del estante elimina errores de venta, maximiza la capacidad y aumenta los ingresos brutos por columna.

Desglose del paso de la espiral (Coil Pitch)
-
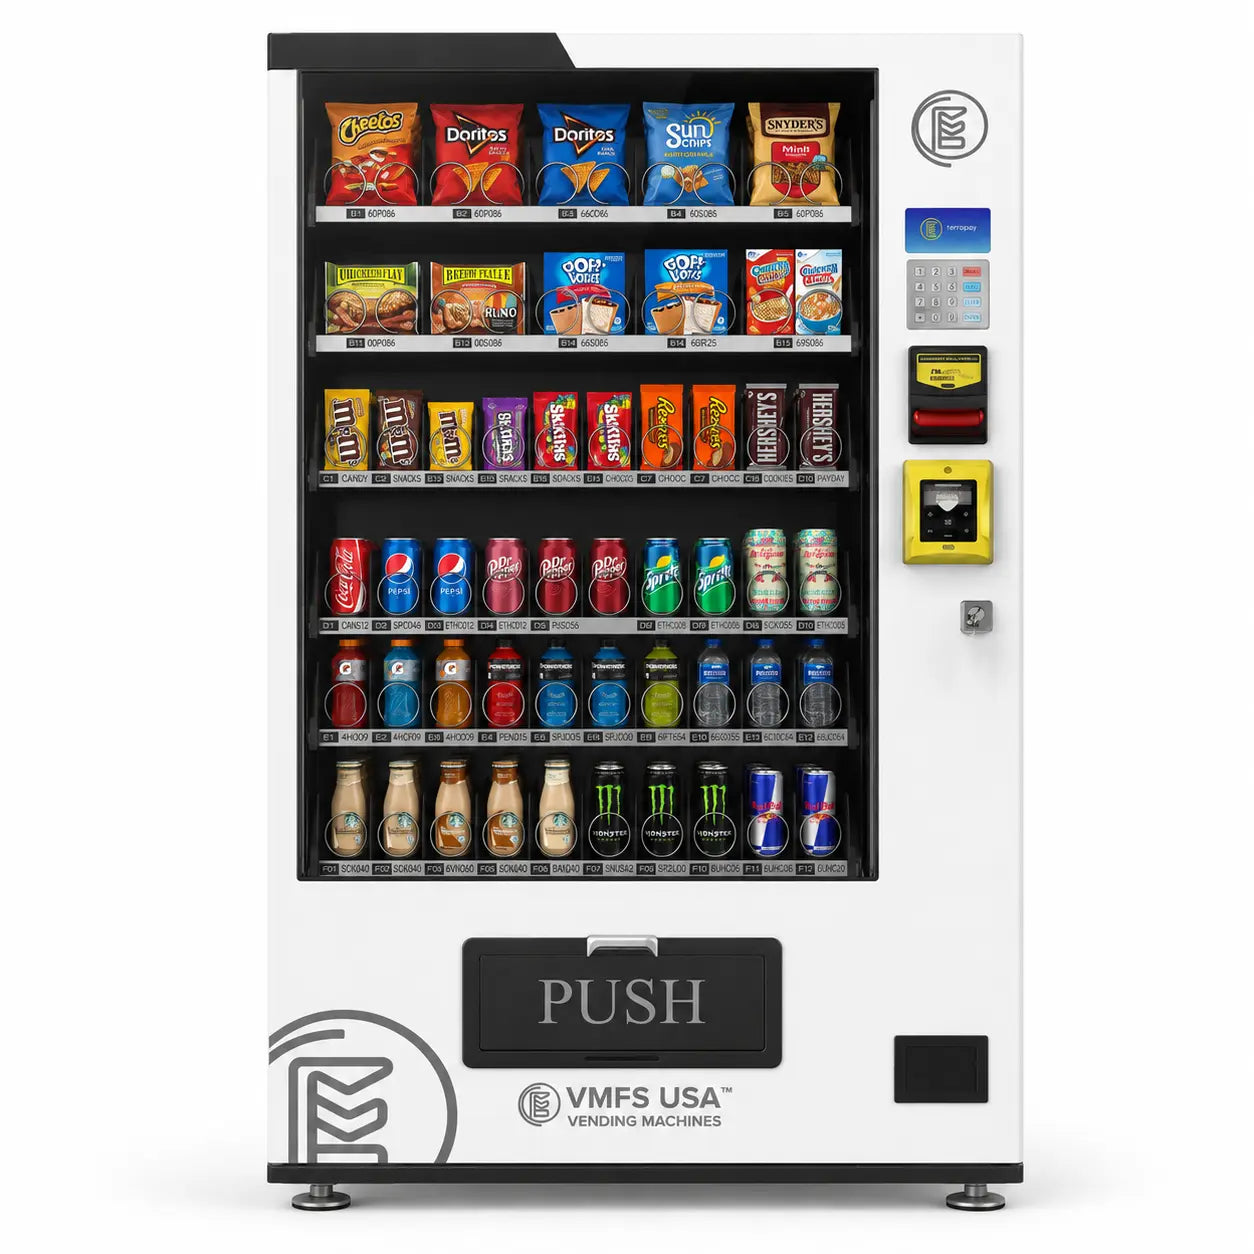
Paso 5 a 6 (Snack ancho / Bolsa grande): Diseñado para artículos de alto volumen inflados con aire, como papas fritas o totopos. El espaciado más ancho (2.0 a 2.5 pulgadas) evita que el empaque se aplaste y se bloquee contra las espirales adyacentes.
-
Paso 8 a 10 (Snack mediano / Pastelería): Ideal para artículos empaquetados densos de grosor medio, como pasteles de desayuno, galletas grandes o barras de chocolate de tamaño familiar.
-
Paso 12 a 15 (Dulces estándar): Diseñado para artículos estrechos, incluyendo barras de chocolate estándar, snacks de fruta o galletas saladas.
-
Paso 18 a 24 (Artículos pequeños / Planos): Utilizado exclusivamente en columnas estrechas de las bandejas superiores para paquetes de chicles, mentas o palitos de carne seca.
Estructuración de ingresos del planograma
Estructure los diseños de las bandejas basándose en la física de la línea de visión humana y la distribución del peso:
-
Zona de beneficios a la altura de los ojos (Bandejas 2 y 3): Posicione sus productos de mayor margen (puntos de precio de $2.25 a $3.00+) directamente a la altura de los ojos (48 a 60 pulgadas desde el suelo). Coloque artículos especiales de alta impulsividad aquí para maximizar el rendimiento por venta.
-
Zona de productos pesados (Bandejas 4 y 5): Reserve las bandejas inferiores para artículos pesados, bebidas embotelladas o artículos combinados grandes. Colocar productos pesados en la parte inferior reduce el centro de gravedad y los riesgos de que la máquina se vuelque.
Al fijar los precios de estos artículos, siga las reglas establecidas sobre fijar precios de productos para obtener ganancias para garantizar un margen bruto adecuado en todas las bandejas.
Pautas específicas de carga por tipo de máquina
La arquitectura del gabinete de la máquina dicta técnicas de carga específicas para espirales de snacks a temperatura ambiente, columnas de caída de bebidas, unidades de temperatura múltiple con frente de cristal y refrigeradores inteligentes.
1. Máquinas de espiral para snacks a temperatura ambiente
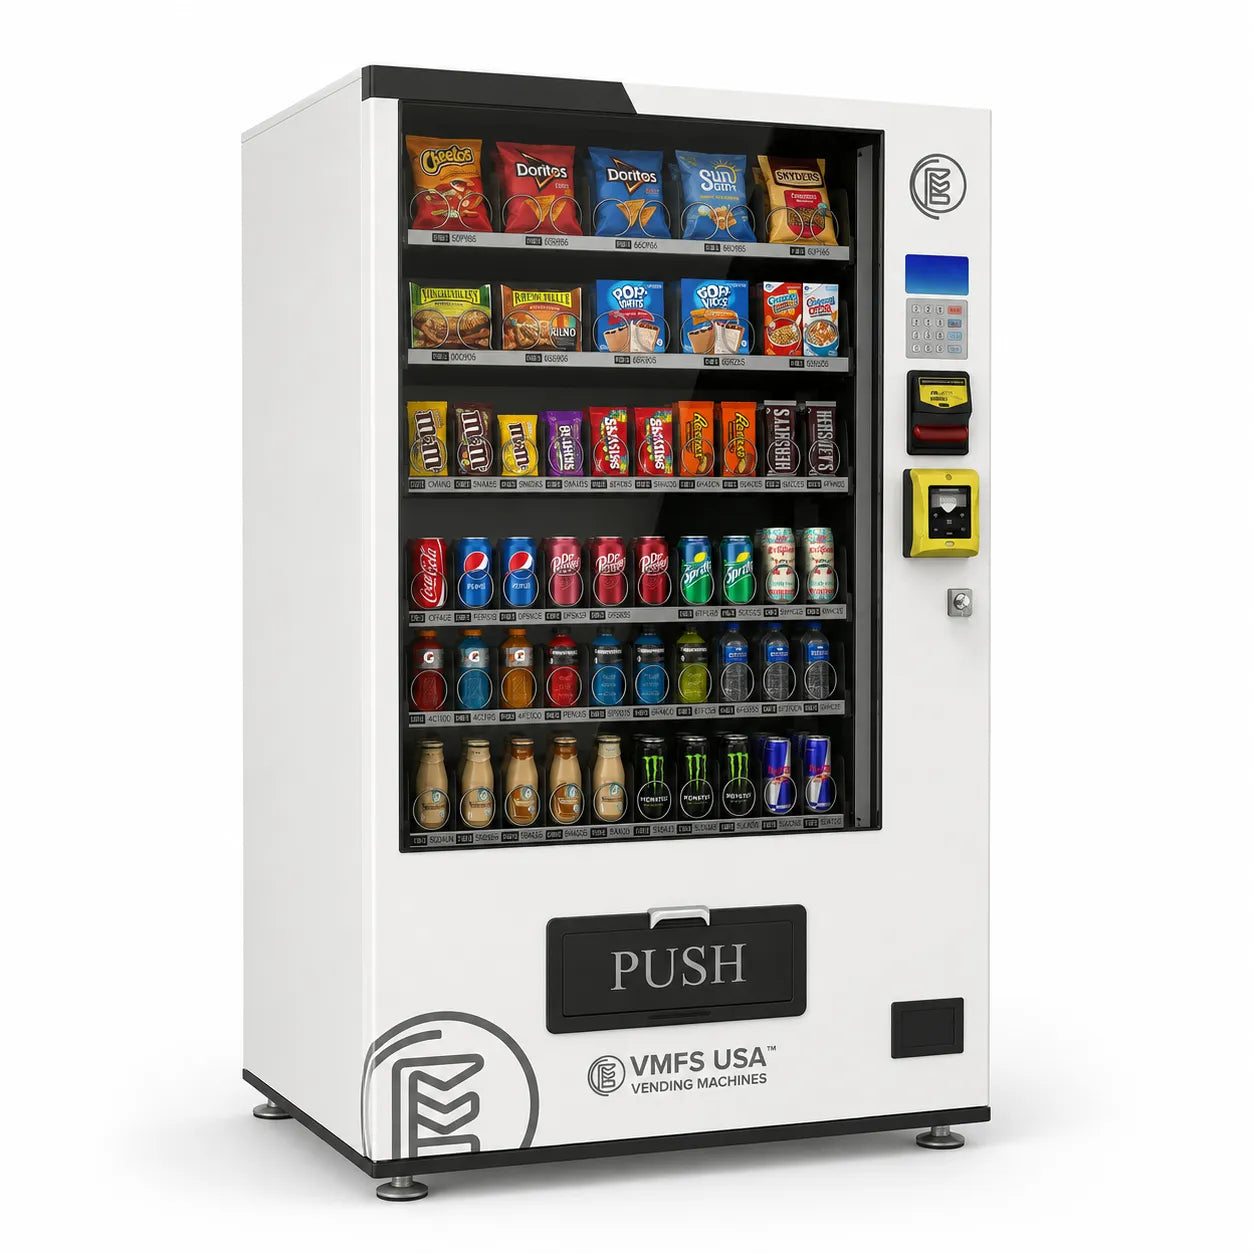
La mecánica de carga en las máquinas expendedoras de snacks estándar se basa en bobinas de espiral de alambre que empujan el inventario hacia adelante sobre el borde de la bandeja.
-
Inclinación de la bandeja: Tire de los pestillos de la bandeja hacia adelante e incline el estante hacia abajo hasta su posición de bloqueo de servicio para acceder fácilmente a las bobinas traseras sin tener que sacar toda la bandeja de los rieles laterales.
-
Carga desde abajo hacia arriba: Cargue los paquetes con la parte posterior primero (costura inferior hacia abajo) y con la marca del producto hacia el frente. Nunca doble ni meta las costuras superiores de las bolsas hacia atrás sobre el alambre, ya que el lazo posterior se enganchará en la película plástica durante la rotación.
-
Alineación de doble bobina: Para columnas de bandejas anchas que utilizan espirales dobles, asegúrese de que ambos motores estén sincronizados para que ambas bobinas giren hacia adentro simultáneamente.
2. Máquinas de bebidas con columnas de caída y frente de cristal
Los mecanismos de entrega de bebidas dentro de las máquinas expendedoras de bebidas dedicadas utilizan columnas de caída vertical o bandejas con empujadores motorizados.
-
Columnas de latas escalonadas: Al cargar latas de 12 oz en columnas tradicionales de caída, alterne las latas a la izquierda y derecha a lo largo de la guía deflectora interna. Asegúrese de que la lata inferior se asiente firmemente contra la compuerta del rotor de liberación.
-
Orientación de las botellas: Cargue las botellas de plástico PET de 20 oz con el cuello primero o la base primero estrictamente de acuerdo con las instrucciones del fabricante del gabinete. Invertir la orientación de la botella provoca atascos dentro de las tolvas de caída vertical.
-
Ajuste de tensión del empujador: En las unidades de bebidas con frente de cristal, ajuste los bloques de tensión de los empujadores con resorte traseros. Se requiere una alta tensión de resorte para empujar las pesadas botellas de vidrio de 20 oz, mientras que las latas de aluminio ligeras requieren una tensión reducida para evitar aplastar las paredes blandas.
3. Máquinas combinadas y de temperatura múltiple con frente de cristal
Las máquinas expendedoras combinadas refrigeradas requieren una gestión cuidadosa del paso del aire para mantener temperaturas internas estables.
-
Espacio para el flujo de aire: Mantenga una separación mínima de 2 pulgadas entre el empaque del producto y la carcasa del ventilador del evaporador trasero. Bloquear las ventilaciones internas de retorno de aire provoca picos de temperatura, lo que activa los cortes de seguridad en las bandejas de lácteos y alimentos frescos.
-
Calibración del corte de seguridad sanitaria: Asegúrese de que los sensores de temperatura marquen menos de 41°F (5°C) antes de terminar el servicio en las bandejas de alimentos frescos. Si las temperaturas superan los umbrales de seguridad, los controladores de las máquinas modernas bloquean automáticamente las columnas de selección de alimentos.
Cálculo de niveles de stock óptimos y cadencia de reabastecimiento
Establecer niveles de stock (par levels) matemáticamente sólidos garantiza que las máquinas no se queden sin los productos más vendidos entre las visitas de servicio programadas.
Fórmula de optimización de la cadencia de reabastecimiento
Calcule la cadencia objetivo de reabastecimiento basada en la capacidad total de la máquina:
$$\text{Cadencia de reabastecimiento objetivo (días)} = \frac{\text{Capacidad total de la máquina} \times 0.70}{\text{Volumen promedio diario de ventas de la ruta (unidades)}}$$
Realizar el servicio a una máquina cuando está vacía en un 30% (queda un 70% de capacidad) mantiene una alta eficiencia de reabastecimiento, evitando paradas improductivas donde los conductores solo agregan un puñado de artículos. Revise nuestra guía detallada sobre el costo de surtir una máquina expendedora para calcular las necesidades exactas de capital de trabajo en toda su flota.
Trampas comunes de reabastecimiento y cómo evitarlas
Evite estos cinco errores operativos al cargar equipos en el sitio:
-
Sobrellenar las bobinas más allá de su capacidad mecánica: Forzar barras de chocolate o bolsas de snacks adicionales en un paso de bobina diseñado para menos artículos crea un atasco físico. El motor eléctrico se detendrá, fundiendo un fusible del gabinete o arrojando un código de error de "Motor bloqueado" en el controlador.
-
Doblar las costuras superiores de los snacks en bolsas: Meter la solapa sellada superior de una bolsa de papas fritas sobre el bucle del alambre hace que la bobina giratoria apriete el empaque de plástico contra el techo de la bandeja. El artículo queda colgado a mitad de camino, decepcionando al cliente y activando reintentos del sensor de caída.
-
Ignorar el equilibrio de peso de la columna: Colocar botellas de bebidas pesadas de 20 oz en las bandejas de alambre superiores provoca que el estante se hunda y falle prematuramente el riel deslizante. Cargue siempre las bebidas pesadas en los estantes inferiores reforzados.
-
Descuidar el mantenimiento óptico del sensor de caída: Con el tiempo, las partículas de polvo, sal y azúcar de las bolsas de snacks se acumulan en las lentes de los sensores de caída infrarrojos. Los sensores ópticos sucios hacen que el controlador asuma que los productos han caído cuando no es así, o viceversa. Limpie las lentes de los sensores mensualmente con toallitas con alcohol.
-
No restablecer la posición de inicio del motor: Empujar las bobinas de espiral manualmente sin desconectar el pasador de transmisión del motor desalinea la posición de inicio. Utilice siempre la función "Prueba de motor / Inicio de todo" del menú del controlador después de realizar ajustes manuales en la bandeja.
Si encuentra fallas mecánicas persistentes en el lugar, consulte nuestra referencia de solución de problemas para problemas comunes de las máquinas expendedoras de snacks.
Próximos pasos operativos relacionados
Una vez que sus flujos de trabajo de carga estén estandarizados, integre estas rutinas operativas en su negocio:
-
Equipe a los conductores de ruta con kits de mantenimiento: Asegúrese de que cada conductor de ruta lleve artículos de reparación esenciales (motores de repuesto, sensores de caída, tubos de monedas, cables de arnés) armando un kit basado en nuestra guía de herramientas esenciales para operadores.
-
Alinee las rutinas de reabastecimiento con los contratos de ubicación: Ajuste sus tiempos de servicio programados a las horas de operación de las instalaciones del cliente para minimizar las interrupciones por ruido durante las reuniones, utilizando los términos descritos en su plantilla de contrato de máquina expendedora.
-
Optimice las métricas de ruta a escala: Aplique marcos de carga sistemáticos en rutas de múltiples máquinas en crecimiento aprendiendo cómo usar números reales para escalar de forma más inteligente.
-
Cree valor en la ruta para una futura salida: Los POE operativos estandarizados, los planogramas limpios y los registros automatizados de pre-kitting aumentan directamente la valoración del negocio al ejecutar una estrategia de salida para el negocio de máquinas expendedoras a largo plazo.
Conclusiones clave
-
El pre-kitting reduce el tiempo de permanencia en la ruta: Empacar bolsas específicas para cada máquina en su almacén mediante telemetría remota reduce el tiempo de servicio en el sitio de 20 minutos a 8 minutos por máquina.
-
Aplique la rotación de primero en entrar, primero en salir (FIFO): Siempre mueva el inventario más antiguo hacia adelante y cargue el producto fresco en la parte posterior de la bobina o estante para eliminar existencias vencidas y desperdicios.
-
Ajuste el paso de la bobina a la geometría del producto: Alinee el conteo de bucles de la bobina de espiral (p. ej., paso de 6 para papas fritas anchas, paso de 12 para barras de chocolate delgadas) para eliminar los disparos de sensores de caída y errores de venta.
-
Calibre sensores de caída y motores: Pruebe los sensores de caída y los interruptores de posición inicial durante cada visita de reabastecimiento para mantener un alto tiempo de actividad de la máquina.
Preguntas frecuentes
¿Cuánto tiempo debería llevar reabastecer una máquina expendedora en el sitio?
Cuando se utiliza un sistema de pre-kitting en almacén, dar servicio y reabastecer una máquina expendedora estándar combinada o de snacks lleva entre 7 y 10 minutos por parada. Si abastece manualmente desde el inventario de la camioneta (el método de almacén móvil), el tiempo de permanencia aumenta de 18 a 25 minutos por máquina, lo que reduce drásticamente la productividad diaria de la ruta.
¿Cuál es el orden correcto para cargar snacks en una máquina expendedora?
Cargue snacks anchos en bolsas (papas fritas, pretzels, palomitas de maíz) en las bandejas superiores usando bobinas de paso 5 o 6, pasteles densos en las bandejas intermedias usando bobinas de paso 8 o 10, y barras de chocolate estándar o galletas en las bandejas inferiores usando bobinas de paso 12 o 15. Coloque los artículos especiales de alto margen a la altura de los ojos (bandejas 2 y 3) para maximizar la velocidad de ventas.
¿Qué sucede si se llena demasiado una bobina de la máquina expendedora?
Llenar demasiado una bobina en espiral bloquea el empaque del producto contra las bobinas adyacentes o los techos de las bandejas, evitando que el artículo caiga en el contenedor de entrega. Esto tensa el motor de la columna, activando con frecuencia reintentos del sensor de caída, códigos de error de falla del motor o bloqueos de columna fuera de servicio.
¿Cómo se evita que los snacks se atasquen en la espiral de la máquina expendedora?
Para evitar artículos atascados, seleccione el paso de bobina correcto para el grosor del producto, cargue las bolsas con las costuras inferiores hacia abajo, asegúrese de que las costuras posteriores de la bolsa no estén metidas sobre los cables de la bobina y verifique que las bobinas se detengan en la posición inicial de las 6 en punto. Además, limpie regularmente las lentes de los sensores ópticos de caída para garantizar una detección adecuada del producto.
¿Con qué frecuencia debe reabastecerse una máquina expendedora?
La frecuencia de reabastecimiento depende del volumen diario de ventas y la capacidad de la columna, pero la mayoría de las ubicaciones comerciales requieren servicio cada 7 a 14 días. Los sitios industriales de alto volumen o las salas de descanso escolares pueden requerir un reabastecimiento semanal o diario para evitar columnas agotadas de productos de alta rotación.
¿Cómo sé si una bobina necesita una configuración de motor doble?
Utilice configuraciones de motor doble con espirales dobles sincronizadas siempre que cargue artículos anchos que pesen más de 7 onzas, como bandejas grandes de comida para microondas, paquetes de pastelería dobles o artículos de comida fresca pesados. Las bobinas dobles mantienen nivelado el empaque ancho a medida que avanza sobre el borde de caída de la bandeja, evitando que un lado caiga prematuramente y se atasque.
Compartir:
Reubicar frente a retirar la máquina: una guía de decisión para ubicaciones de vending no rentables
Comisión vs. Alquiler vs. Ubicación Gratuita: La guía definitiva para máquinas expendedoras