Export ready American built machines in stock, shipping from Miami
How to set up Cantaloupe card reader for Vending Machines
Introduction:
The vending industry is moving fast toward cashless and contactless payments, and operators want a clear path to set up Cantaloupe card reader hardware the right way. A Cantaloupe reader lets customers pay with cards, phones, and digital wallets, which increases convenience and reduces cash handling. This guide explains the MDB standard, shows how to set up Cantaloupe card reader hardware and activate it, and clarifies how it integrates with VMFS USA machines.
Many VMFS USA vending machines are MDB ready, so a Cantaloupe reader will usually plug in and work with no special middleware. If you run new vending machines or upgrade to smart vending machines, an MDB cashless reader is the most direct way to accept EMV and NFC payments without changing your core machine. You can jump to the sections on what MDB is, how to install and activate, and compatibility with VMFS USA models as needed.
We keep the coverage technical and practical. You will learn how the VMC acts as master on the bus, how the cashless device negotiates prices and authorizations, and what to check before power up. If you use management tools or Cloud software, or plan to use financing services for hardware purchases, you will also see where those fit into your rollout. By the end, you will be confident in planning, wiring, activating, and validating telemetry for a smooth cashless launch.
What Is MDB (Multi-Drop Bus)?

Before you set up a Cantaloupe card reader, it helps to understand the MDB system that makes communication between vending devices possible. MDB, short for Multi-Drop Bus, is the industry-standard protocol developed by the National Automatic Merchandising Association (NAMA). It defines how the main vending control board and its connected peripherals exchange commands and data.
In an MDB network, the vending machine controller (VMC) acts as the “master.” It manages communication with several “slave” devices such as coin changers, bill validators, and cashless readers. These connections share a common 24V DC power line and a serial communication channel that transmits data at a fixed baud rate defined by the MDB specification. The structure ensures that messages like price settings, credit confirmations, and vend authorizations are consistent across all brands of equipment.
How MDB Works in Practice
When a customer selects a product, the VMC sends the vend price to the attached devices through the MDB line. A set up Cantaloupe card reader interprets that price, processes the payment, and returns a signal authorizing the vend. Once the VMC confirms payment, it activates the machine motors to dispense the item. The entire transaction happens in milliseconds through this standardized message structure.
Why MDB Matters for Operators
The main reason MDB matters is interoperability. Any machine that follows the MDB standard can typically work with any MDB-compliant device. That means most new vending machines can integrate a Cantaloupe reader or other MDB payment module without extra control boards or adapters. This standardization also simplifies support, replacement, and upgrades, which saves time and reduces downtime in the field.
With MDB, operators gain flexibility to mix and match hardware that fits their business. Whether you add smart vending machines or expand to cashless-only setups, the protocol ensures devices share a common language. Understanding this foundation is essential before you wire, mount, or activate a reader on any MDB-ready VMFS USA model.
Key MDB Protocol Features and Supported Devices

The MDB protocol defines clear electrical and data standards so that all connected peripherals can communicate reliably with the vending controller. When you set up a Cantaloupe card reader, you are connecting it into this ecosystem of MDB-compatible devices. Understanding the key features of the protocol helps operators troubleshoot faster and choose the right hardware for their smart vending machines.
Common MDB Devices
The most common peripherals that use MDB connections include:
- Coin changers for accepting and returning change
- Bill validators for paper currency acceptance
- Card readers or cashless modules such as the Cantaloupe series
Each device plugs into a standard 6-pin connector labeled “MDB” or “CASHLESS.” This connector provides 24V DC power and the serial communication lines for data transfer. When you set up a Cantaloupe card reader, the connection typically goes between the bill validator and the coin mechanism using a pass-through harness, allowing the reader to join the same data chain.
Protocol Behavior and Communication
In normal operation, the vending machine controller sends a price signal through the MDB line when a customer makes a selection. The set up Cantaloupe card reader then authorizes payment, notifies the controller that credit is available, and waits for the vend confirmation. After a successful dispense, the controller updates the transaction status. This back-and-forth message sequence ensures synchronization and prevents double vending or incomplete transactions.
Version and Compatibility Notes
Later revisions of the MDB standard, especially version 4.3 and higher, added extended cashless and telemetry functions. These enable secure data exchange for EMV transactions and remote monitoring through Cloud software. When installing on VMFS USA new vending machines, operators should confirm the board’s MDB version through the user manual or VMFS support. Machines with modern firmware support the latest Cantaloupe features, including digital wallet compatibility and real-time sales reporting.
Tip for Operators
Always confirm your vending machine’s MDB compatibility before installation. If your board supports advanced cashless communication, your set up Cantaloupe card reader process will be straightforward. Proper verification upfront ensures the reader initializes correctly, communicates with the VMC, and provides full telemetry support for performance tracking.
Overview of Cantaloupe Card Readers
Cantaloupe, Inc. (formerly USA Technologies) is a U.S. leader in cashless payment and telemetry systems for the vending industry. When you set up a Cantaloupe card reader on a VMFS USA vending machine, you are using one of the most trusted devices for secure, seamless, and real-time transactions. The company’s readers are designed around MDB compliance, which allows them to work smoothly with most new vending machines and smart vending machines.
Popular Cantaloupe Reader Models
Cantaloupe offers several models that differ in form and connectivity, but they share a common design focus on reliability and ease of integration:
- Engage Combo – A touchscreen reader that accepts EMV chip, tap, and swipe payments, as well as NFC wallets such as Apple Pay, Google Pay, and Samsung Pay.
- G11 – A durable swipe and tap reader known for its simple setup and strong network reception.
- ePort Connect – A legacy but still widely used unit that integrates with Cantaloupe’s Seed platform for cashless payment and data reporting.
Core Features and Capabilities
Each reader comes with essential hardware and software features that make installation and operation consistent across machines. These include:
- Built-in 4G or Wi-Fi connectivity for cloud-based reporting
- Full EMV and NFC payment support with PCI-compliant security
- Simple plug-and-play MDB harness connection
- Integration with Cantaloupe’s Seed management portal for remote monitoring and analytics
When you set up a Cantaloupe card reader and connect it to your machine’s MDB port, it begins communicating directly with the vending controller. Sales, refunds, and machine status updates are transmitted to the Seed platform through secure Cloud software connections, allowing you to monitor performance and inventory from any location.
Why Operators Choose Cantaloupe Readers
Operators appreciate Cantaloupe’s balance between durability and flexibility. The readers are easy to mount, activate, and manage across large fleets. Their reliable network connection means fewer offline events, and their compliance with NAMA and PCI standards guarantees secure transactions. VMFS USA ensures that its MDB-compliant machines recognize these readers without requiring firmware changes, making them ideal for operators upgrading to a full cashless experience.
Pre-Installation Checklist
Before you set up a Cantaloupe card reader, take time to verify that the machine and site conditions meet the basic technical and connectivity requirements. A quick inspection and confirmation can prevent setup errors and reduce troubleshooting later. The checklist below covers the essential preparation steps for any MDB-compliant vending machine.
1. Power and Safety
Always power off the vending machine completely before beginning installation. Disconnect the main power cord and ensure the internal circuits are fully discharged. This prevents electrical shorts when connecting the MDB harness or mounting the reader hardware.
2. Verify MDB Support
Check that your vending machine supports the MDB protocol. You can confirm this by reviewing the control board label, the user manual, or a technical data sheet from the manufacturer. The presence of a six-pin “MDB” or “CASHLESS” connector usually indicates compatibility. Without an MDB interface, the set up Cantaloupe card reader process will not function correctly.
3. Locate the MDB Port
The MDB port is typically found near the coin mechanism or the machine’s main control board. Trace the harness from the coin changer if necessary. Ensure there is sufficient cable length and space to connect both the reader and any existing peripherals through a pass-through harness.
4. Prepare the Mounting Area
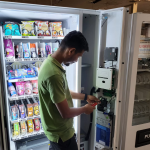
Identify a location on the machine’s front panel where customers can easily access the reader for swiping, tapping, or inserting a card. Make sure the surface is flat and clean before attaching the mounting bracket. If your machine already has a knockout panel for a cashless device, use that opening for a clean, secure fit.
5. Confirm Required Components
Before starting installation, make sure you have all necessary components and credentials ready:
- The reader unit with MDB harness
- Mounting bracket and screws
- Power supply if required (for older boards with limited MDB power output)
- Login credentials for your Cantaloupe operator account
6. Network and Connectivity Check
Cantaloupe readers rely on a stable cellular or Wi-Fi signal to transmit transaction and telemetry data through Cloud software. Test signal strength near the machine location before installation. Poor reception can cause delays in activation or prevent the reader from appearing online in your account dashboard.
Final Step Before Mounting
Double-check that the machine is still powered off and that no foreign objects are obstructing the mounting space. Once all items on this list are verified, you are ready to proceed to installation and activation. Following these steps ensures your set up Cantaloupe card reader process runs smoothly and safely from the start.
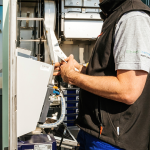
Installing and Activating a Cantaloupe Card Reader
Once the pre-installation steps are complete, you are ready to set up a Cantaloupe card reader. Installation involves mounting, connecting, and activating the device through your Cantaloupe account. Follow these steps carefully to ensure a stable connection and smooth communication with your vending controller.
1. Power Off the Machine
Always begin with the machine completely powered off. Disconnect the main cord from the outlet to prevent short circuits. Connecting MDB devices while the system is energized can cause damage to the reader or control board.
2. Mount the Reader
Choose an accessible location on the front panel where customers can easily tap, insert, or swipe their cards. Use the provided mounting bracket and screws to secure the reader firmly. Ensure the unit sits flush and level to maintain a professional appearance and optimal user experience.
3. Connect the MDB Harness
Find the six-pin MDB connector near the coin mechanism or control board. Plug the reader’s MDB harness into this port. If other peripherals are already in place, use the pass-through connector on the reader cable to maintain the data chain. Confirm that each connection is snug and that no pins are bent.
4. Power On and Initialize
Reconnect power to the vending machine. The reader should illuminate and display an initialization message or LED sequence within a few seconds. This confirms it is receiving 24V DC power and communicating with the vending controller. If the reader remains inactive, recheck power continuity and harness alignment.
5. Register and Activate the Reader
Log in to your Cantaloupe operator portal and register the reader by entering its serial number. Assign it to the correct machine or location for accurate reporting. Activation links the device to your account, enabling telemetry and transaction tracking through Cloud software.
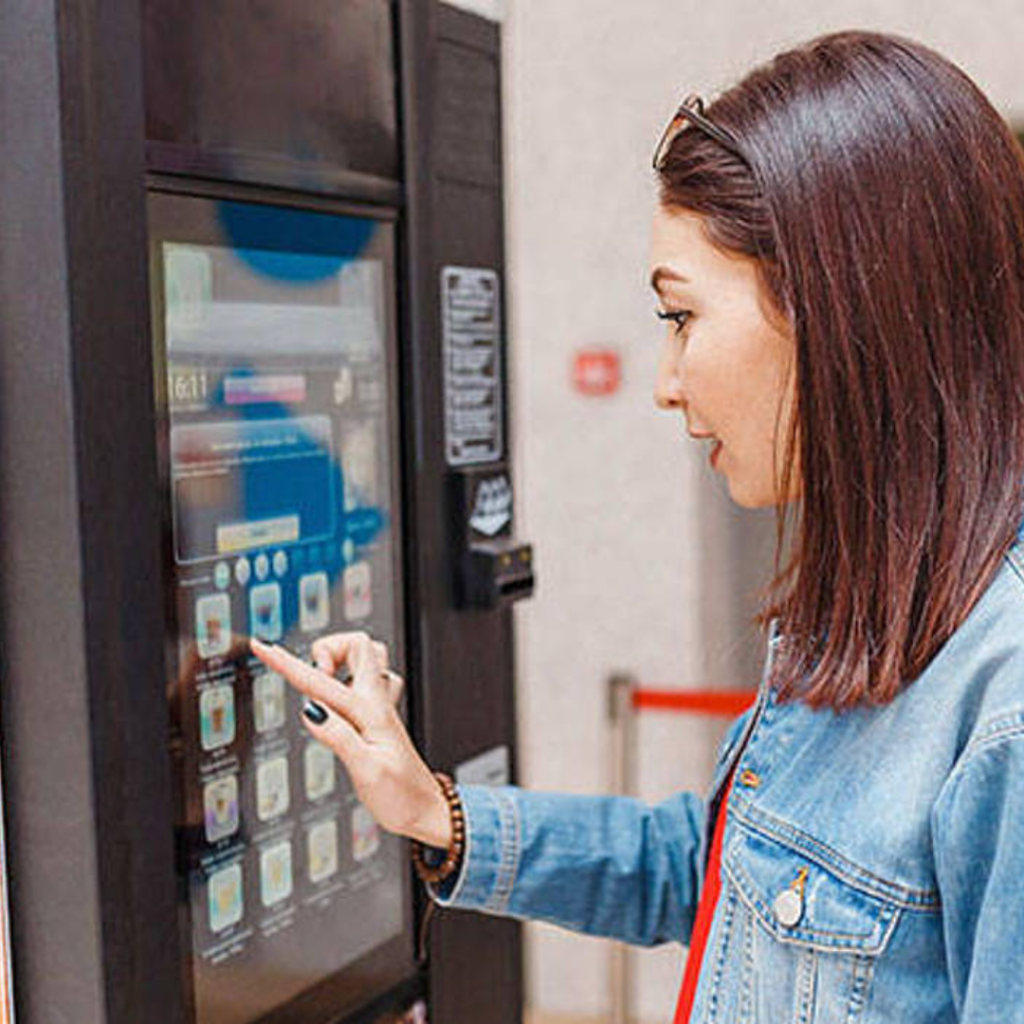
6. Test a Transaction
Perform a test payment by swiping, inserting, or tapping a valid card or digital wallet. A successful vend confirms communication between the reader and the machine’s VMC. Observe the reader’s screen and the controller response to verify proper pricing, authorization, and vend release.
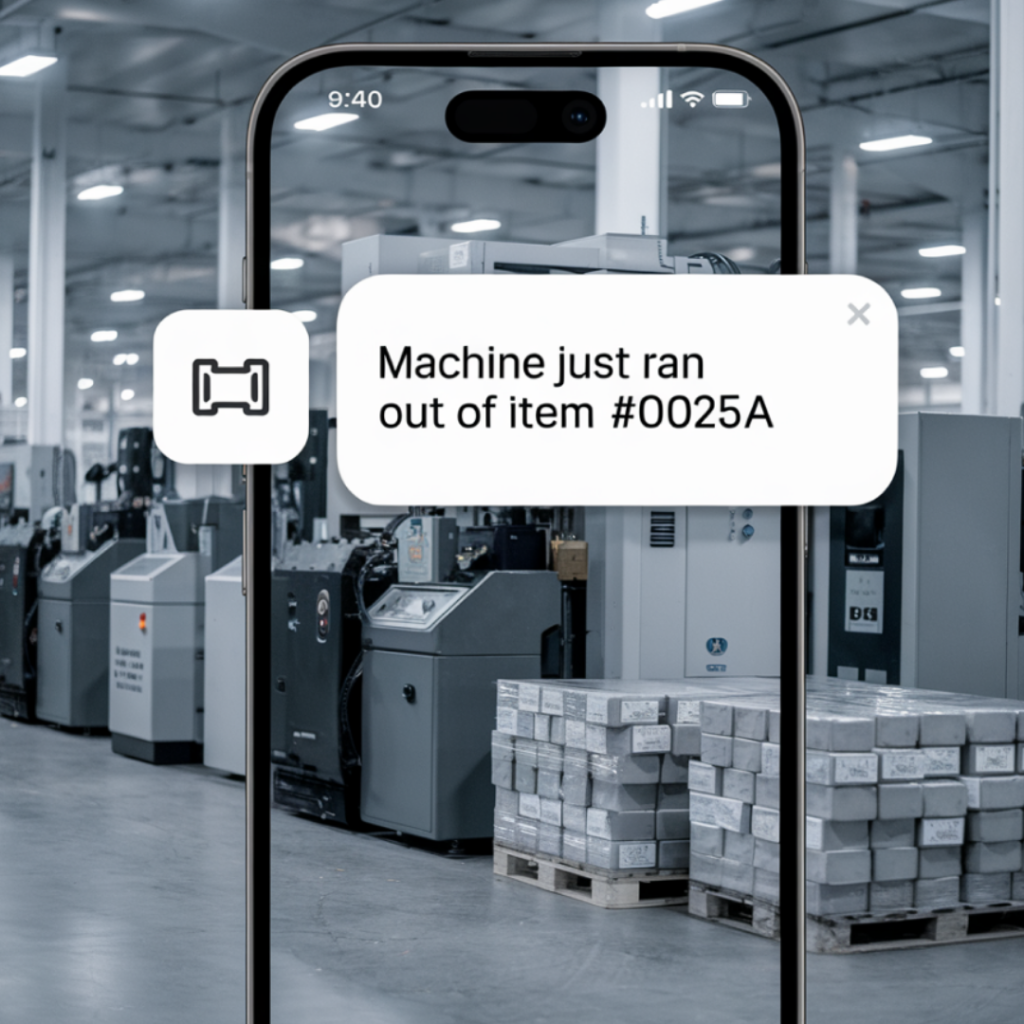
7. Check Telemetry Data
Once activation is complete, open your Cantaloupe dashboard to confirm that telemetry data—such as transaction totals and signal strength—is reporting correctly. This confirms that your set up Cantaloupe card reader process is complete and the reader is online.
Common Setup Issues
- No Power: Check for a 24V signal on the MDB line and confirm connectors are properly seated.
- Payment Not Vending: Verify that the vending machine’s control board has its cashless mode enabled.
- Reader Offline: Confirm cellular or Wi-Fi signal quality and verify activation status in your Cantaloupe account.
After completing these steps, your reader should be fully operational and ready for customer use. Accurate installation ensures smooth transactions, stable telemetry, and reliable long-term performance for your cashless vending setup.
Compatibility: Using Cantaloupe Readers with VMFS USA Machines
Before you set up a Cantaloupe card reader, it’s important to understand how these readers interact with different vending machine models. Cantaloupe readers follow the MDB standard, which means they can communicate with almost any modern controller that supports this protocol. Most VMFS USA models are built around MDB-compliant boards, allowing direct connection and immediate functionality without extra hardware or software.
Compatibility Overview
The majority of modern vending controllers can recognize a Cantaloupe device as soon as it’s connected to the MDB line. Once power is restored, the controller identifies the reader as a “cashless peripheral” and begins sending standard price and authorization messages. If the reader is properly activated, transactions will process immediately.
Key Compatibility Points
- Protocol Support: Machines that follow the NAMA MDB 3.0 or later standard will support both basic and advanced cashless features, including EMV tap and chip payments.
- Power Supply: The MDB harness provides a consistent 24V DC output. Machines with stable MDB power can run the reader directly without external adapters.
- Data Communication: Because the card reader functions as a “slave” on the bus, the VMC must be configured to allow cashless communication. Most boards ship with this feature enabled by default.
- Firmware: Ensure that your controller firmware is up to date. Older firmware revisions may require a minor update to recognize the latest Cantaloupe protocols.
Best Practices for Operators
- Confirm MDB compliance in your machine’s technical manual before purchasing or installing a reader.
- Keep firmware current to maintain security and compatibility with EMV standards.
- After installation, test both card and mobile wallet transactions to confirm stable communication.
- Maintain a clear network path for telemetry data sent through Cloud software platforms.
Why Integration Is Simple
The set up Cantaloupe card reader process does not require special controllers or proprietary software. The reader uses the same data channel as coin and bill peripherals, which keeps wiring straightforward. Machines that already support MDB peripherals will automatically recognize the reader as part of the payment chain. This makes integration nearly plug-and-play for operators transitioning to cashless vending.
Reassurance for Buyers
Cantaloupe has tested its devices across a wide range of MDB vending systems, ensuring reliable performance and consistent communication. The hardware and firmware are built around open standards, so compatibility issues are rare. For any machine-specific configuration details, contact your equipment provider’s technical support. A verified setup ensures your reader performs efficiently, reduces downtime, and delivers accurate reporting through connected smart vending machines.
Maintaining and Monitoring Your Cantaloupe Reader
Once you set up a Cantaloupe card reader and confirm it is operating correctly, regular maintenance and monitoring are essential to keep performance consistent. These readers are designed for long-term reliability, but periodic checks help prevent downtime and ensure accurate transaction reporting.
Firmware and Software Updates
Cantaloupe periodically releases firmware updates to improve stability, enhance security, and support new payment standards. Check your operator portal for notifications about available updates. Performing updates promptly ensures the reader remains compatible with the latest EMV requirements and maintains reliable communication with Cloud software dashboards.
Reviewing Transaction Data
Monitor transaction records and telemetry data regularly through your Cantaloupe portal. Review sales reports to confirm that the reader is transmitting data consistently. Sudden gaps in transaction logs or irregular timestamps can indicate network issues or interruptions in MDB communication. Identifying these early helps maintain uptime and accurate revenue tracking.
Physical Maintenance
Clean the card slot and contact surfaces using a soft, lint-free cloth. For contactless readers, gently wipe the tap area to remove fingerprints, dust, or residue that might affect NFC performance. Inspect the reader’s harness periodically to ensure no connectors are loose or worn. Avoid using liquid cleaners or abrasive materials that could damage the protective coating or display.
Operational Monitoring
Observe the reader’s display for any error codes or network status indicators. Most models show real-time connectivity and power status, which can alert you to issues before they affect customer transactions. Check that the reader’s lights or screen are active during machine operation and that payment authorizations complete smoothly.
Connectivity Verification
Reliable connectivity is critical for cashless vending. Verify that the cellular or Wi-Fi signal remains strong at your machine location. If you notice frequent offline events, consider repositioning the antenna or switching to a different network option. Stable data transmission ensures that each transaction is processed correctly and reported through your smart vending machines management platform.
Long-Term Reliability
Consistent maintenance reduces service calls and extends device life. When properly installed and monitored, a Cantaloupe reader can operate for years with minimal attention. Routine inspections, accurate telemetry tracking, and proactive updates will keep your set up Cantaloupe card reader system functioning efficiently and delivering seamless cashless experiences for customers.
Troubleshooting and Support
Even when you set up a Cantaloupe card reader correctly, issues may arise from power, communication, or network factors. Understanding how to diagnose common symptoms saves time and helps restore service quickly. Most problems can be traced to connection order, signal strength, or configuration mismatches, all of which are easy to resolve once identified.
Reader Does Not Power On
If the reader display remains blank after powering up the vending machine, first confirm that the MDB connector is fully seated. The MDB harness supplies 24V DC power from the control board, so a loose or misaligned pin can prevent startup. Use a multimeter to check for voltage on the MDB line if necessary. If power is present but the reader is inactive, inspect for damaged wires or signs of corrosion around the connector.
No Response After Tap or Swipe
When a customer taps or swipes but no authorization occurs, verify that the reader is registered correctly in your Cantaloupe portal. The reader must be assigned to an active location or machine ID to process transactions. Confirm that your vending controller has its cashless mode enabled in the settings menu. Without this, the machine will not accept payment authorizations from the reader, even if the reader is active.
Reader Online but No Vends Occur
If telemetry data shows that the reader is connected yet the machine does not vend after payment, check the vend price settings and ensure that the reader and control board share the same currency parameters. Also verify that no errors or timeouts appear on the controller display. Restarting both the machine and the reader can reset communication and often resolves minor synchronization issues.
Reader Not Showing Online
When the reader fails to appear online in your operator dashboard, inspect the network signal first. Poor cellular or Wi-Fi strength is the most common cause of offline reports. Reposition the antenna or relocate the machine if possible. Check that the SIM card or Wi-Fi credentials are active and correctly entered. If connectivity remains unstable, contact Cantaloupe technical support for assistance in verifying network provisioning.
Machine Not Recognizing the Device
For situations where the vending machine does not detect the reader at all, review firmware compatibility. Older boards may require an update to support the latest MDB cashless protocols. Consult your equipment manual or contact technical support for firmware guidance. Properly updating the control board ensures that the set up Cantaloupe card reader process integrates fully with the machine’s payment logic.
Getting Additional Help
If you encounter persistent problems after performing these checks, reach out to your equipment provider’s support team or Cantaloupe technical services. Provide the reader serial number, machine model, and a brief description of the issue. Detailed information allows technicians to guide you through advanced diagnostics quickly. Reliable troubleshooting ensures that your smart vending machines stay active, secure, and profitable with minimal interruption.
Conclusion
Learning how to set up a Cantaloupe card reader is a practical way to bring your vending operation into the cashless era. These readers connect easily to most new vending machines and smart vending machines through the MDB interface, allowing secure transactions with cards and mobile wallets.
Follow the correct installation steps, including mounting, wiring, registration, and testing, to ensure smooth performance and accurate data reporting through Cloud software. Regular cleaning, checking signal strength, and updating firmware will keep your system dependable for daily use.
Cashless payments increase convenience for customers and improve efficiency for operators. A properly installed Cantaloupe reader turns any MDB-ready vending machine into a connected and reliable asset that supports consistent revenue and easy management.